Brow Routine: 2015

Hi Everyone!

Today I decided that I’m going to share my brow routine. Lately, I have been getting stopped often by people asking me about my brows- what do I use, how did I get them to look like that? Etc. I think I’ve finally nailed down a routine that I really like, so it’s the right time to share it. I will be using Anastasia Beverly Hills products in this tutorial since these are the best ones that I’ve found. Of course this is just what works for my brows and my face, but it should be helpful for those of you experimenting with filling in your brows.

Tools

  • Facial Scissors
  • Tweezers
  • A Brow Brush
  • Spoolie

Grooming

In terms of grooming, I do maintain my brows myself for the most part. I’m not a professional, but this method has been working well for me. I will occasionally get them threaded to clean them up, but usually I just do it myself. I have never gotten my brows waxed because the thought of someone yanking on the skin around my eyes scares me. Maybe irrational, but I can’t shake the thought.

The best piece of advice I can offer you in terms of brows is to maintain them and maintain them often. Pluck and trim often. I will pluck almost every time before I do my makeup because it’s way easier to see where stray hairs are than if you leave them and then try to do one big groom. If you leave it too long, it can be super hard to see where to tweeze and that’s when you pull out hairs that you shouldn’t.

In addition to tweezing, I also trim pretty often. My brows grow wild in the front so trimming is a must. The best thing you can get to help you with this is a spoolie. You can find them pretty inexpensively, but mine came on the end of my brow brush. To trim them, you’re going to want to do a little at a time, this will help prevent mistakes. If you’re not comfortable trimming yourself you can of course get a professional to do this part and just do the tweezing on your own.

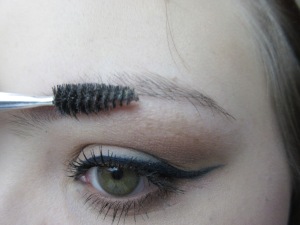
I’ll first comb through my brows with the spoolie. Then I will take my spoolie and comb all the hairs down. My brows have a pretty rounded arch so it’s easy for me to see what’s long. I will then take my scissors and trim any hair that is below the arch. I then repeat for the other brow. Sometimes I’ll comb down again and trim a little extra if there is any. Then I repeat the same process but this time I comb the hairs up and trim anything that is above the top line of my brow. For this step all hold the spoolie there while I trim to keep the hairs up otherwise the hairs won’t stay up and in place for me to trim.

Combing down:

IMG_6502

Combing up:

IMG_6504

Once i have the main part of my brows trimmed, I will carefully trim the front part of my brow. This is challenging because the hairs in the front of my brow grows in different directions, but I just trim enough so it’s not super noticeable. If there are some that are obviously out of place in the front, I’ll pluck but I try not to pluck too much because it can make your brows look really bizarre and harsh if you mess up the front.

Filling in

My natural brows:

IMG_6490

Now onto the good part. Filling in your brows. You can fill on your brows to do a variety of things, even if your brows aren’t sparse. My brows aren’t really sparse, but I fill them in to even them out since one arch is higher than the other, make them look polished and make them a little thicker. I do dye my hair darker than my natural colour, so this helps my brows stand out against my hair as well.

As I said in the beginning I use Anastasia Beverly Hills products so I will be using the DipBrow Pomade in the shades Medium Brown and Soft Brown. I will also be using the Anastasia Beverly Hills Brow Brush #12, which is my favourite brow brush.

Step 1

IMG_6508

First I’ll take my spoolie and brush the hairs into their natural places, so I can see exactly where to fill. I actually begin with the tail of my brow using the darker of my 2 shades, Medium Brown. I will create a ‘hard’ line to outline the outer tail of my brow and then feather in about half my brow. I will use light, short strokes when filling in so it looks natural and be a little firmer when creating the outside line so it looks defined. Just guess how far to take the darker shade if you’re using 2 like I am and you can always touch up later.

IMG_6509

Step 2

Now I’m going to take the shade Soft Brown and start sculpting the inner half of my brows. To begin I will create a ‘hard’ line right at the front of my brows going back in the direction of the tail. I place this line slightly higher than the lowest hair in the front, because I find if I line it up with the lowest hair it makes my brows curve down the front, kind of a unibrow effect.

IMG_6512

I will then do the exact same thing along the top of my brow connecting the line with where I stopped the Medium Brown.

IMG_6513

Step 3

I will then fill in all the ’empty’ space with Soft Brown. I will use soft strokes mimicking hairs. The brush I’m using is the perfect size so if I just need to fill in all over, I’ll turn it sideways and fill in that way.

IMG_6514

Step 4

Now all that’s left is the very front. For this I will use the brush vertically with a very light hand and run the product through the front. I will usually leave a few hairs at the very front with no product just to make the brows look natural. Plus like I said my brow hairs at the front are wonky, so filling in right to the end just doesn’t look right. You can now use the spoolie to blend out the product if you feel it’s necessary. At this point I will often touch up with Medium Brown and deepen my arch a little.

IMG_6515

If you need you can set your brows with brow gel at this stage. The dipbrow lasts on me all day so I usually don’t bother.

Here is the finished brow! Soft, yet defined. I’m not really into the carved out brow look on my face.

IMG_6567

And of course your brows are sisters not twins so some days they just will not look the same. We all have uncooperative brow days. I swear some days my brows are distant cousins not sisters.

So there you have it, there is my current brow routine! What brow products do you love? Leave them in the comments below!

Bye for now!

Chelsey

Anastasia Dipbrow Pomade: Review

Hey Everyone!

I have a new review for you today! I recently have been testing out a new brow product and I thought I would share my thoughts. I recently made an order through Anastasia Beverly Hills website to order a Contour Kit (review coming soon) and I also picked up a Dipbrow Pomade, since they now carry my shade, Soft Brown. I have been using the Anastasia Beverly Hills Brow Whiz for a few months now, so I’ll probably use that for comparison, just as a reference since that is what I’m used to. Onto the review!

Pomade.jpg

DSC_0016

DSC_0018

The Packaging

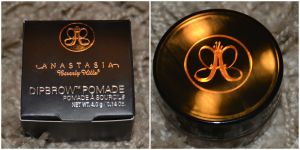
I’m going to start off by discussing the packaging. This is a glass jar with a black screw cap. It’s pretty solid packaging, but not bulky. Esthetically, I love the copper accents of the logo, it looks stunning and so fancy. Most importantly, this comes with tons of product for the price. The jar contains 4 grams of product, which is lots considering it takes such a small amount. This product sells for $18USD or $23CAD.

The Product

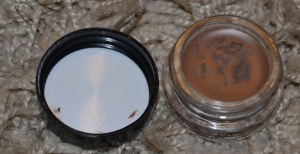
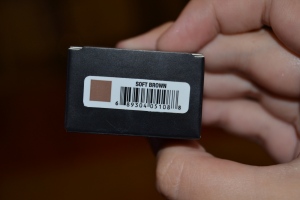
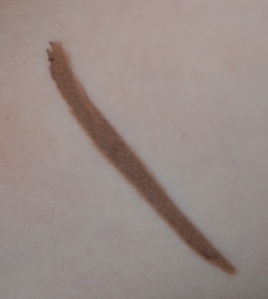
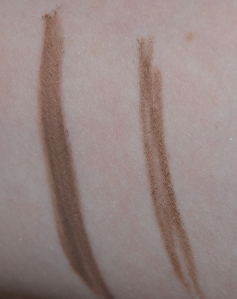
This product’s texture really reminds me of a gel or cream eyeliner. It’s super smooth and glides on like butter. I couldn’t believe how smooth it was the first time I used it, it takes no effort to pick up some on your brush and get it into your brows. The shade I chose was Soft Brown, which is advertised for medium brown hair with warmth. I currently have red in my hair, so this shade makes sense. I will say though, that I wouldn’t say this shade is exactly the same as the brow whiz in Soft Brown. I’m not sure if it’s due to the thicker consistency of the Pomade, but I definitely notice more warmth in this when I first put it in my brows, as opposed to the brow whiz which I find to be a little more ashy. Even when I swatched it it looks the same, but in my brows I swear it’s different at first. It’s almost as if the Pomade adjusts to my brows because once it’s set, it’s a pretty close match and not so warm.

Anastasia Beverly Hills Dipbrow Pomade in Soft Brown

Anastasia Beverly Hills Dipbrow Pomade in Soft Brown

Dipbrow Pomade-left. Brow Whiz- Right

Dipbrow Pomade-left. Brow Whiz- Right.

Application and Appearance

The application of this product has a learning curve in my opinion. It’s such a pigmented product that it can easily get out of hand and all of the sudden your brows are intense. Even with just a little bit, this product is built for statement brows. With thick, luscious brows being so in style this isn’t a bad thing, but it can easily get out of control. Even using it very controlled, it still looks too strong for me at first until I finish all of my makeup. This is probably related to using the Brow Whiz, which is a much softer look.

To apply this I initially used an angled eye liner brush, but I was finding it too thick, which wasn’t helping with the initial brow shock. To try and get a more natural appearance, I’m currently using a Sigma Waterliner Brush because it’s super thin and can get into small spots under the arch of my brow or right at the base of my brow. I’m not 100% sold on this brush, as I would like to try something denser to better shape my brows even further, but it is working for now. Another must have that I think this product needs is a spoolie. I use the spoolie on the end of my Brow Whiz and it really helps to brush out some of the product and disperse it to make it look more natural. I would definitely suggest investing in a spoolie if you plan on using this product. In a pinch, a clean old mascara wand works as well.

What I’ve found so far is that when I’m doing a full face of makeup, the Pomade really completes the look and polishes my brows so they go with the rest of my face. If I’m just wearing light makeup, say for work then I find this looks a little heavy and the brow whiz suits that kind of look better. As well, the pomade does take more time to make sure it is all brushed out and looks soft enough, whereas the Brow Whiz is easier for me to just fill in some sparse areas and that’s it. I don’t prefer one of the other, I just think they suit different purposes.

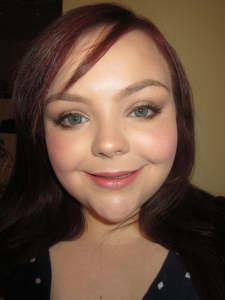
I’m going to include to picture from my latest FOTD so you can see what this product looks like with a full face of makeup.

IMG_2030

Staying Power

In terms of staying power, this stuff is pretty much bullet-proof. It sets and it does not budge. Due to it’s texture, it really does hold down brow hairs and the colour stays in place. I do set this with a clear brow gel because I think brushing the gel through helps to make them more natural, but I doubt it would budge if I didn’t. It does have an edge or the Brow Whiz here because I find the Brow Whiz to fade quickly if it’s not set.

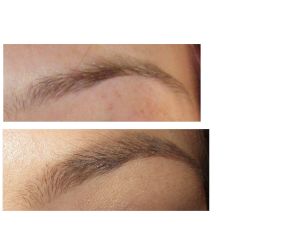
I’m going to include a ‘Before and After’ picture, just so you can see how this looks in my brows. I do have pretty full brows naturally, so it’s not a dramatic difference, but more polished I think.

Top: Natural brow Bottom: Brow filled in with Anastasia Dipbrow in Soft Brown

Top: Natural brow
Bottom: Brow filled in with Anastasia Dipbrow in Soft Brown

Overall, I really like this product. I think it takes some practice and a clear idea of your eyebrow shape or the shape you’d like to create or it could get really out of hand. I think with practice that this product can look very natural, as it blends well with the natural hairs. That being said, I still wouldn’t recommend this to a beginner because it can get out of hand easily. For a beginner I would recommend the Brow Whiz over the Pomade, just because it’s more difficult to create sharpie brows with. If you’ve been been filling in your brows and are looking for an extra boost, I would highly recommend this product. I’m thrilled that bold brows are in style and I hope this trend is here to stay! Brows really do frame your face and I’m glad to have found so many great products to enhance them!

I hope you’ve enjoyed this review! Let me know in the comments if you’ve tried the Dipbrow or the Brow Whiz and what you thought!

Bye for now!

Chelsey
See my updated 2015 Brow Routine here!